Attention! In this article you will learn how to correctly connect the seat mat emulator in your car. After connecting the emulator please continue reading the installation instruction that was inserted in the parcel/envelope with the emulator! Please follow the TROUBLESHOOTING section in the installation instruction if any problems occur after installation.
Click on the model of your car to read the correct instruction.
• MINI Cabrio/Convertible R57 (2007-2015)
• MINI Clubman R55 (2007-2014)
• MINI Countryman R60 (2010-2016)
• MINI Paceman R61 (2012-2016)
• MINI Roadster R59 (2011-2015)
Location of the seat mat connector and assembly instruction for following cars:
• MINI Cabrio/Convertible R57 (2007-2015)
• MINI Clubman R55 (2007-2014)
• MINI Countryman R60 (2010-2016)
• MINI Coupé R58 (2010-2015)
• MINI Hatch R56 (2006-2013)
• MINI Paceman R61 (2012-2016)
• MINI Roadster R59 (2011-2015)
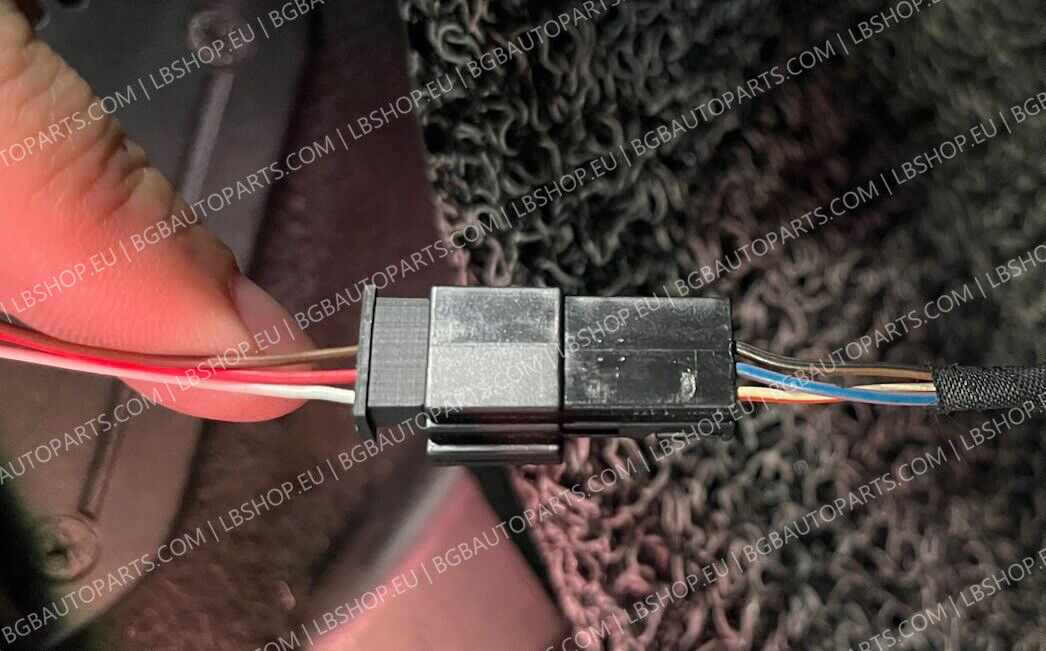
The device you purchased has 2 emulators in one box. First is the seat mat emulator which has 3 wires in colors: brown, red, white. The second is the emulator for the seat belt buckle with wires in colors: red and black, which turns off the sound of an unfasten seat belt that will occur after connecting the first emulator. You need to connect ALL wires. Assembly instruction for the seat mat emulator is shown in steps 1-2 below. Assembly instruction for the seat belt buckle emulator is shown in steps 3-6 below. PLEASE FOLLOW ALL STEPS!
Step 1. The seat mat connector is located under the passenger seat on the back side (check photo 1 below). You can reach it from the rear side of the seat. Disconnect it from the female connector.
Photo 1: The white connector of the seat mat. Disconnect it and connect the emulator in its place.

Step 2. Connect the emulator with your car.
Photo 2: The emulator connected to the car
Check the installation video of the seat mat emulator.
Step 3. Now connect the seat belt buckle emulator. Find a big yellow wiring harness under the seat. We have shown it on photo 3.
Photo 3: big yellow wiring harness
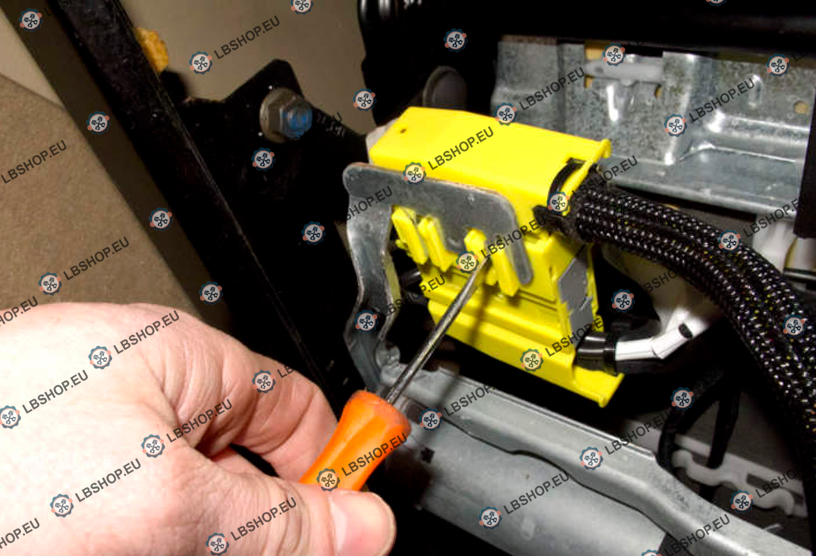
Step 4. Unlock and open the harness.
Photo 4: slide the black lock to open the harness
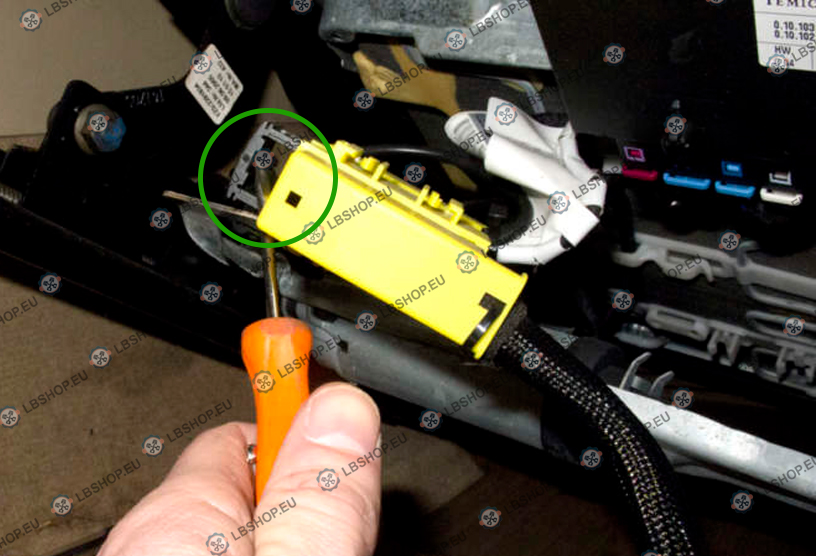
Step 5. Remove the 'L' shaped connector by sliding it to the left. Remember positions of all connectors.
Photo 5: the 'L' shaped connector
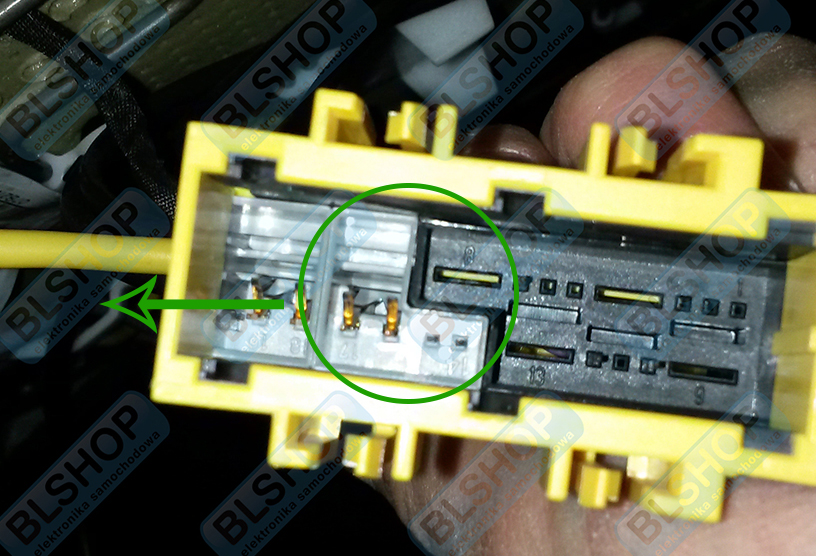
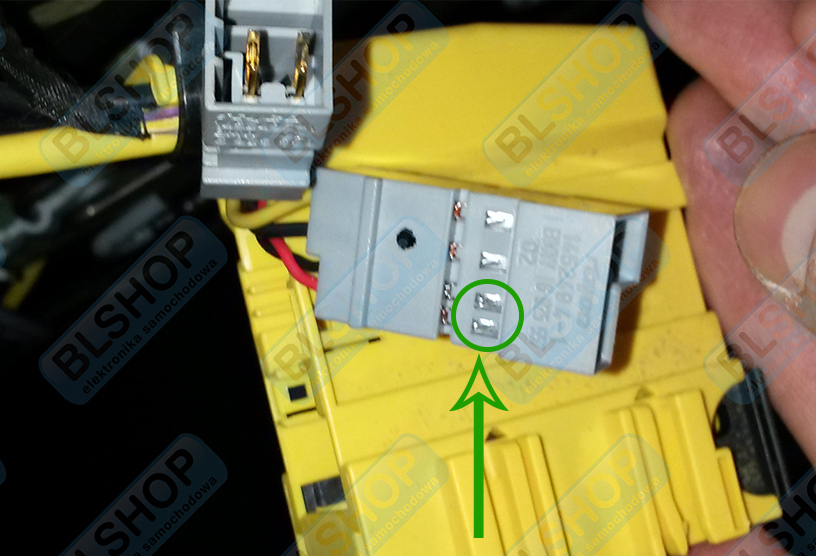
Step 6. Using a small screwdriver, push the pins in the holes and remove the seat belt's wires (black and red). Then insert the seat belt emulator's wires in their place. Red wire into a pin hole where the original red wire was inserted, black wire where the original black wire was inserted. After replacing wires insert all connectors back into the wiring harness and close it.
Photo 6: push these pins to release the wires and exchange them with the emulator's wires
Video tutorial: How to remove wires from a connector and exchange wires

